Setting Up A Hosted VuePress2 Site
How to set up a VuePress2 site hosted on Netlify.
I have been reading about JAM stacks and looking at various options for static site generators as well as hosting.
For static site generators, the new Vue 3 Composition API is great, and VuePress is approachable. New VuePress2 supports Vue3 natively and so it seems the smart choice.
For hosting, Netlify is easy to use and offers a free tier with HTTPS. It is a great option for hosting a static site. They also offer more advanced features such as server side functions and authentication.
Netlify and VuePress2 it is then.
For this walk through I will be working in Bash on Linux.
Setup Bitbucket Repo
You can upload your site to Netlify in a few ways. I like to link a Git repo to Netlify in order to take advantage of the continuous deployment feature. By simply pushing your changes to your repo Netlify will deploy your site to their CDN network.
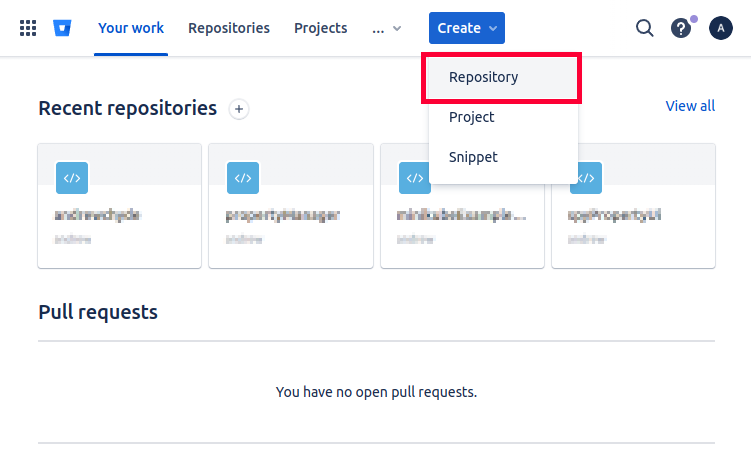
I use Bitbucket for most of my projects, and will be for this example. Log into Bitbucket and click Create->Repository as shown below highlighted in red.
Create Bitbucket Repo
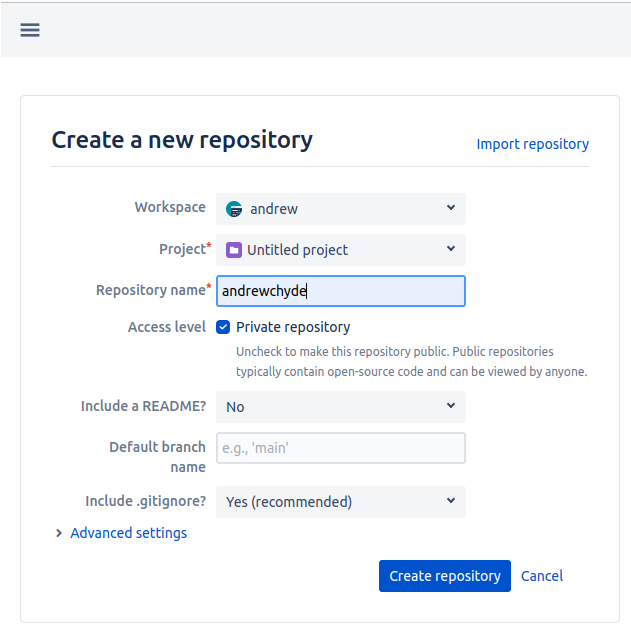
This will open a new dialog as shown below. Here you have the chance to choose a repo name, project, and to override the default settings.
Configure Bitbucket Repo
After filling in the required fields, and clicking the Create repository button your repository is created and Bitbucket will navigate you to the URL of your new repository.
All you need to do now is clone your repository. I prefer to use SSH with shared keys for my Bitbucket repositories. I have already read the documentation and have the SSH shared keys setup.
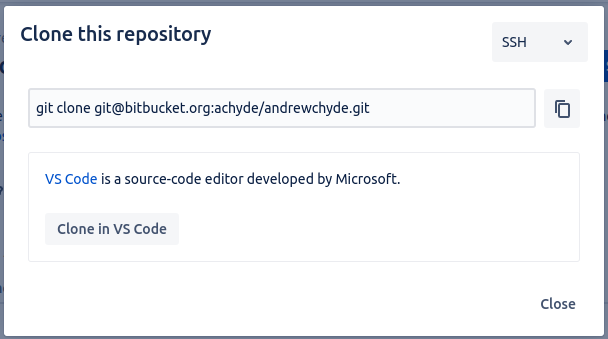
Clicking the Clone button in the top right of your repos main URL will open a new dialog as shown below.
Clone Bitbucket Repo
Make sure you have a git client installed. Copy and paste the command shown in the dialog into your terminal and clone the empty repository.
Setup VuePress
Following the VuePress2 Setup Guide, I have executed the following commands:
git clone git@bitbucket.org:achyde/andrewchyde.git
cd andrewchyde

npm init
npm install -D vuepress@next

echo 'node_modules' >> .gitignore
echo '.temp' >> .gitignore
echo '.cache' >> .gitignore

mkdir docs
echo '# Hello VuePress' > docs/README.md

git commit -a -m 'Initial commit'
git push
I have edited the scripts section of the package.json generated by npm leaving the entire file looking like:
{
  "name": "andrewchyde",
  "version": "1.0.0",
  "description": "jam blog",
  "main": "index.js",
  "author": "Andrew Hyde",
  "license": "ISC",
  "devDependencies": {
    "vuepress": "^2.0.0-beta.39"
  },
  "scripts": {
    "docs:dev": "vuepress dev docs",
    "docs:build": "vuepress build docs"
  }
}
Now running npm run docs:dev will start the server and npm run docs:build will build the site.
npm run docs:devYou should see the following in your browser:
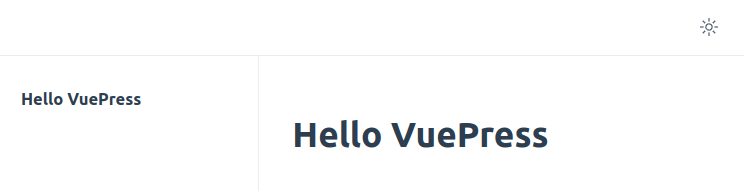
Hello VuePress
Set Up Netlify
I have created a Netlify account connected to my Bitbucket account and logged in. Since we have already created a project we want to import an existing site to Netlify as shown below.
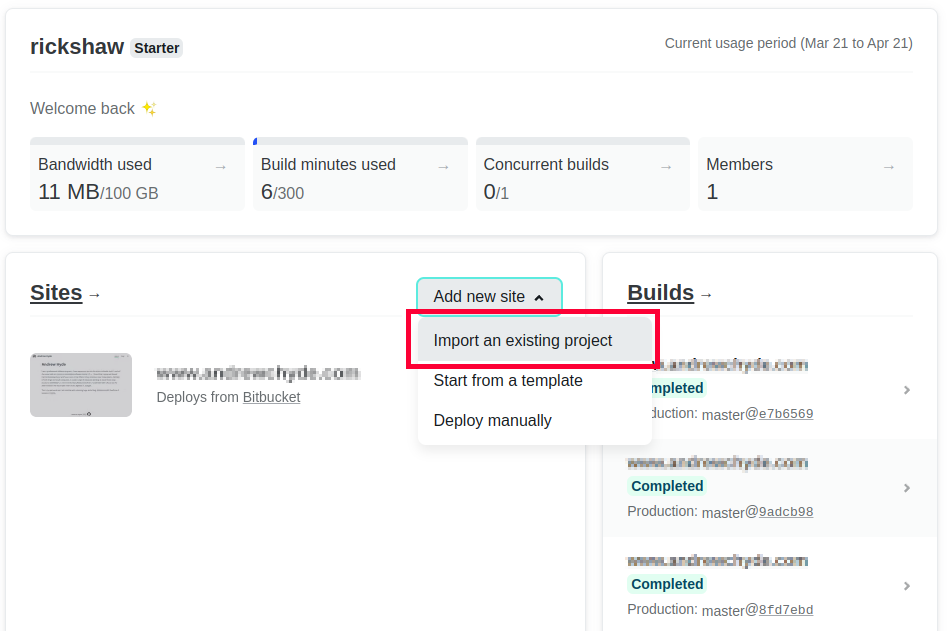
Import Existing Project
The import existing project dialog will open as shown below.
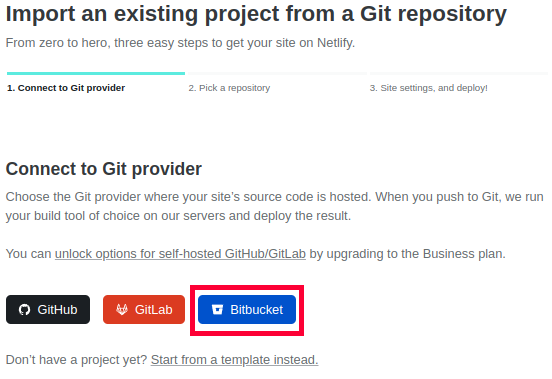
Netlify Import Dialog
Choose Bitbucket and the repository selection list is shown. Note is you have issues here. You may need to configure Netlify to connect with Bitbucket.
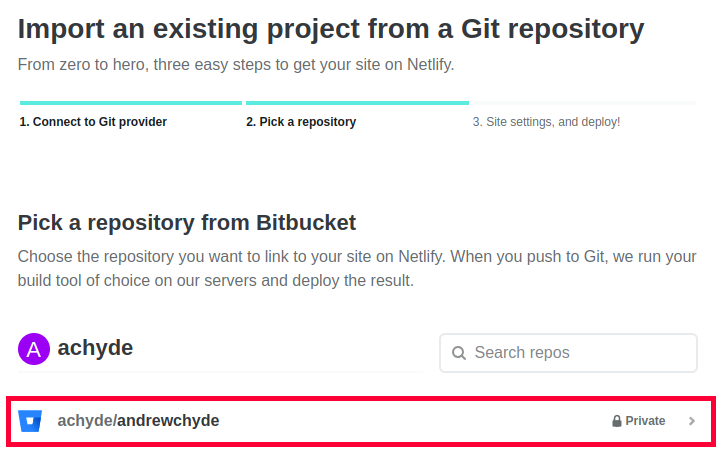
Netlify Pick Existing Repo
Next the build settings dialog is shown. So far we have mostly accepted defaults. Here it is important that we change the default settings. Notice the build command is ‘npm run docs:build’ and the publish directory is docs/.vuepress/dist. Click the “Deploy site” button.
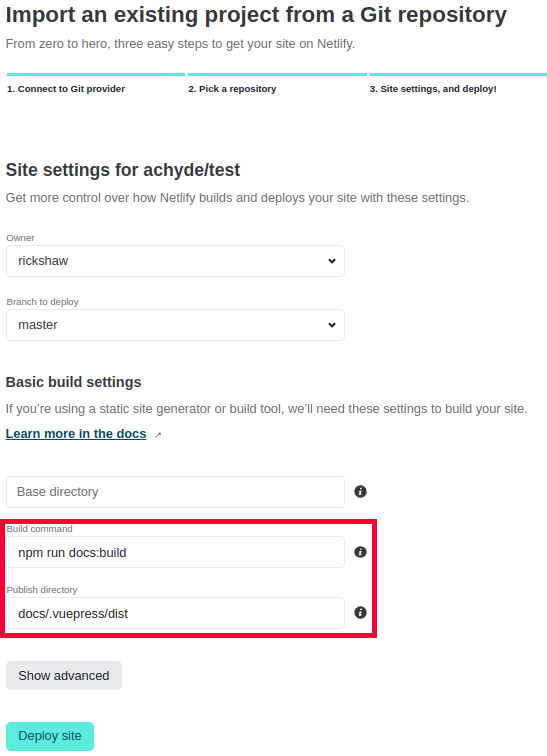
Netlify Import Dialog
Netlify will begin the deployment and this may take a few minutes.
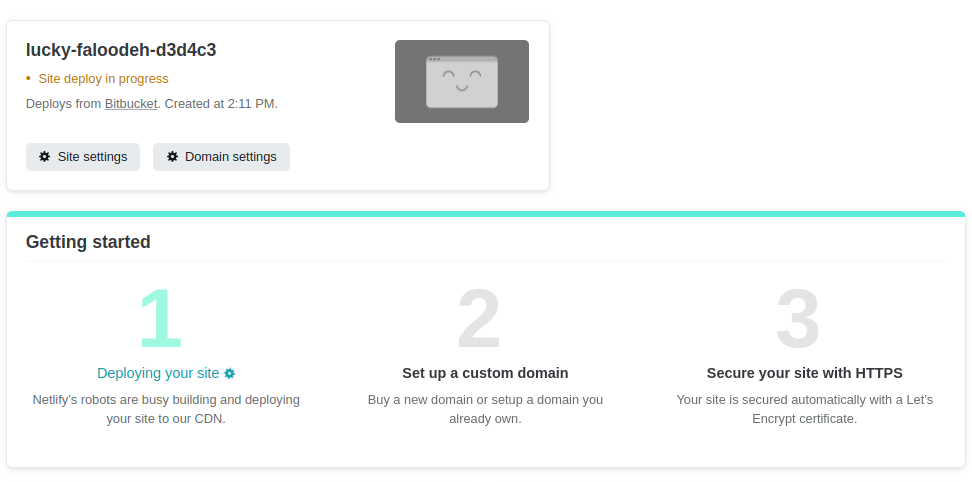
Netlify Site Deploying
After the deployment is complete you will see the following page. Click the link under the site name. Note that Netlify uses a pseudo random name here, so what you see will be different.
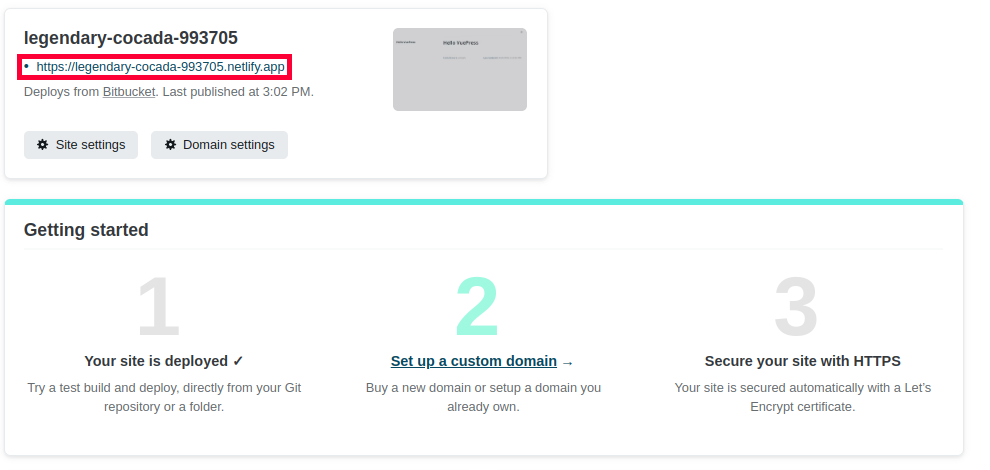
Netlify Site Deployed
You should be looking at the Hello VuePress page very similar to the one we saw earlier as shown below.
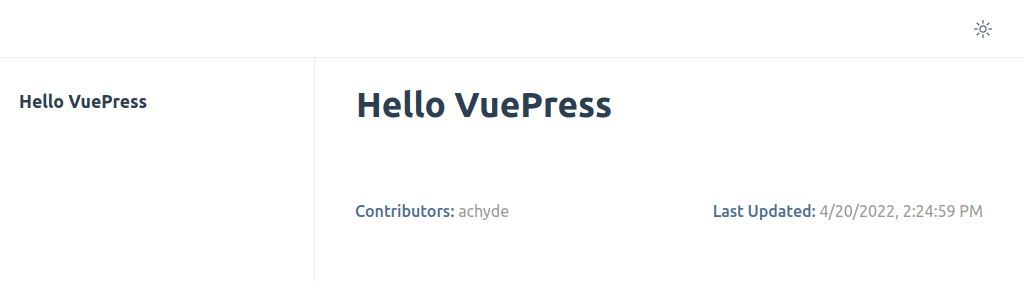
Final Netlify Site
Congratulations!
Next you will likely want to get a custom domain and secure it with HTTPS as described in steps 2 and 3 in the Getting Started section of the site deployment page.
Hopefully this walk through has helped you get started with VuePress on Netlify.